Page 10
CLASSIC JUPITER 2--- Built From Scratch
| Home | 24 inch Jupiter 2 | History/Background | History/Background (cont'd) | Photo Album | Photo Album (cont'd) | Instructions Page | Instructions (con't) | Tips and Troubleshooting | Related Links | Contact Me | Completion of lower deck frame. | Page 4 | Page 8 | UPPER DECK ASSEMBLY PAGE 9 | Page 10 | Page 11


24inchj-2assemblypic44pg.jpg
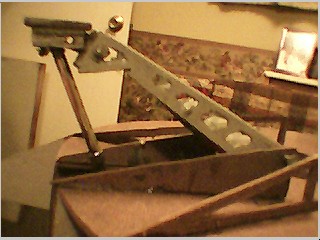
Here's a view of one of the landing gears --- extended.

In order to make the landing gears retractable I had to
use a small radio intenna. I attatched base of the antenna
to the foot of the landing gear. I used a propane tortch
and some plumbers solder to attatch the top of the antenna
to a horrizontal nail inside and at the top of the landing gear bay. I also ran another nail through the base of the landing gear and through the side walls of the base of the
landing gear bay. Now as you can see, the landing gears can
extend or retract.

24inchj-2assemblypic46pg.jpg
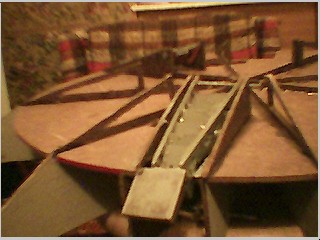
Here's a view of the landing gear --- retracted.

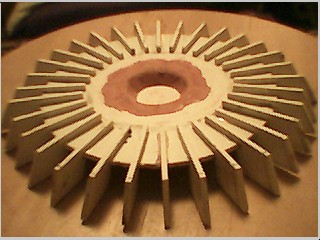
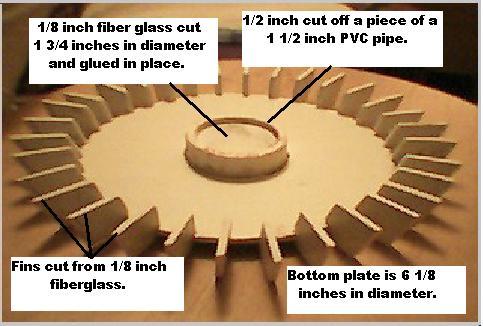
In the pictures below, you can see the the assembly of the
fussion core.

24inchj-2assemblypic47pg.jpg
Here's the fussion core --- partialy assembled.

I cut a 6 1/8 inch disc out of a 1/8 inch piece fiberglass. Then I cut a 1 3/4 inch hole in the center of the disc. After that I cut all 32 fins out of the same material. I had to draw straight lines across the disc until it was divided into 32 equal parts. Then I glued a fin on each line on the outside of the disc. After that I cut a 1/2 an inch off a piece of a 1 1/2 inch PVC pipe and gliued it inside the hole in the center of the disc. Then I cut a 1 1/2 inch disc out of the same fiberglass and glued itside the PVC 1/4 inch above the bottom edge. I took some bondo and applied it to the bottom edge inside the PVC so that it was beveled. Then I took a sanding disc and my drill and some 100 grit sandpaper and sanded the edge
(1/8 inch) off of each fin untile they were all the same lengh.

24inchj-2assemblypic48pg.jpg
In this picture all 32 fins are glued into the fussion core. Now it's ready to be painted.

24inchj-2assemblypic49pg.jpg
Here's an inside view of the fussion core.

Page 11